This month's Project Spotlight is a second floor master bedroom suite addition built over a garage. The addition transformed and updated the exterior of a classic raised ranch home and provided the interior space needed for a stylish and relaxing master bedroom suite with a walk-in shower and walk-in closet.
Homeowner’s Objectives
The homeowner grew up in the house and had long considered expanding the space. Her primary objective was to have an expansive master bedroom addition above the garage that would include:
- Space for a sitting area
- A large walk-in closet
- A modern bathroom with a walk-in shower
- An exterior that would blend seamlessly with the home’s architecture
Building an addition over the garage of a raised ranch home presented a number of structural and design challenges.
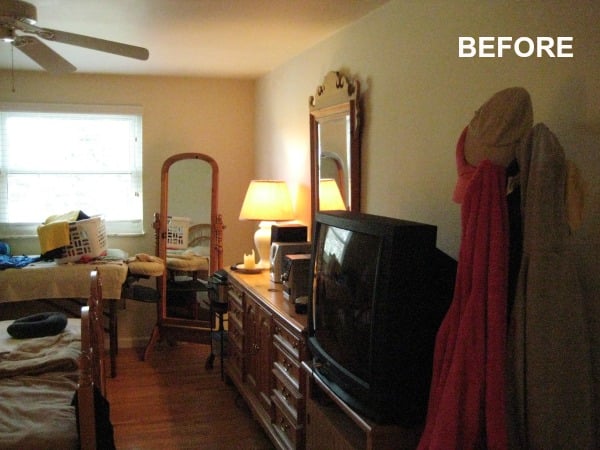
A small crammed master bedroom with an 8-foot ceiling did not meet the needs of the homeowners.”
Design Ideas
The addition would double the size of the existing master bedroom. A new walk-in shower without a door would be added and partitioned with a wall of glass blocks. A large walk-in closet with a shoe island and two walls of fixtures for clothing was planned in the design.
Adding a new gable-end bay window above the garage would add interest to the façade.
A Neal’s designer worked with the homeowner to select products for the project.
The addition doubled the space of the master bedroom.

Challenges
The process of building the second floor addition presented its own set of challenges. Creating new spaces where none previously existed was the primary challenge of the addition. Other challenges included:
- Timing construction to take place during the best weather, and keeping the construction site protected from the elements.
- Designing the project to account for the placement of the fireplace in the family room behind the garage that would impact adding a second story structure.
- Designing the addition to blend with the home’s existing architecture and to enhance aesthetics.
- Specific space needs required by the homeowner, which presented challenges in determining the best way to utilize the new spaces and re-organize existing rooms.
- Modifying the structural features of the first floor and integrating the addition with the home to update and enhance the interior space.
Neal’s Solutions
1. Schedule the project during prime weather conditions.The Project Consultant set up a schedule with the team to assure that construction would be undertaken in the spring and early summer. This type of project can take four to five months with optimal weather conditions.
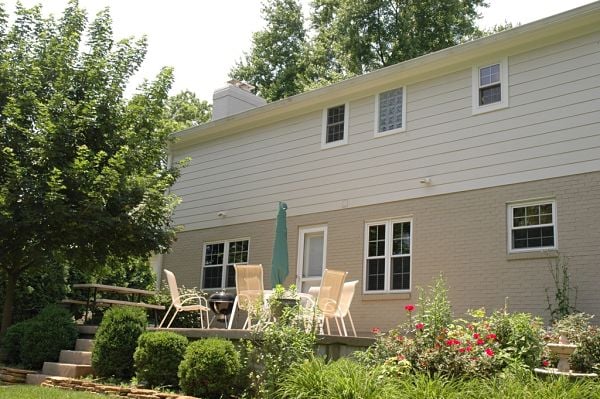
2. Extend the family room fireplace chimney.When the new second floor exterior walls were going up, the existing fireplace chimney was extended as well. The brick was matched in size and pattern for a seamless, taller chimney.

The chimney on the wall of the family room was extended and blended into the addition.

3. Blend the addition with the architecture of the home.
New structural supports would be required to carry the load created by the master suite addition. Support for the additional load was resolved by adding a triple 1¾-by-18 inch LVL beam with six 2-by-4 inch wood studs bearing at each end and adding new 2-by-10 inch floor joists at 16-inch on center in the garage ceiling below the gabled bay area.
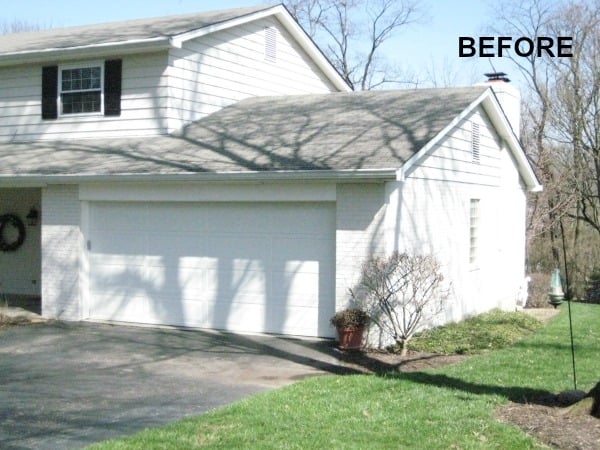
To match the addition to the existing home, and to update the home’s appearance, the vinyl siding on the entire second story was replaced with new HardiePlank siding, which is built for long-term durability. The trim and the brick exterior of first floor were repainted, giving the home a fresh look. The roofing was replaced with dimensional fiberglass shingles.
Vinyl siding was used for the exterior of the addition. The homeowners selected beige exterior siding and paint with white trim to update the look of the home.

4. Reconfigure the interior to meet the needs of the homeowner.
Bathroom. The original master bath was actually two separate areas, a commode with a shower room and a vanity area with no door. A new 9-foot granite vanity top, with a makeup area and his and her sinks, occupies one wall of the master bathroom space. Glass tile accents and glittering details, including the backsplash and the lighting, complement the new glass block shower wall on the other side of the room.
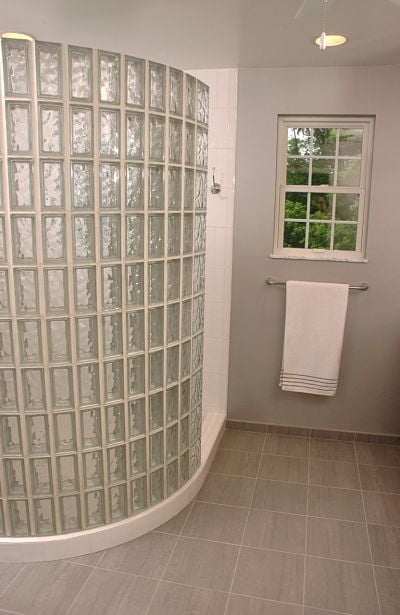
A curved block glass partition wall provides privacy, lets in light and retains water in a walk-in shower without doors.

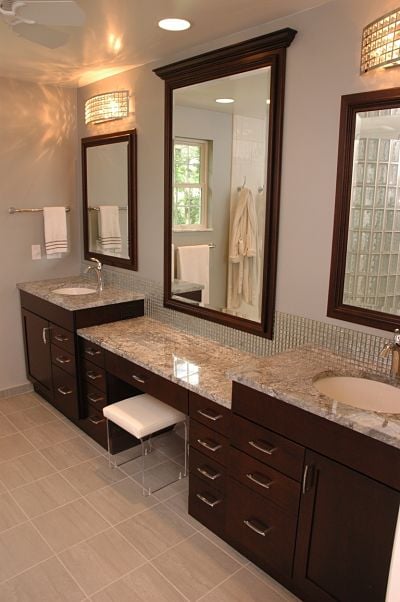
Light fixtures above the vanity, a glass tile back splash and tile flooring set in a grid pattern complement the glass block wall in the master bathroom.

Closet space. A tiny closet was not sufficient to hold the homeowner’s extensive wardrobe and shoe collection. A large portion of the addition, at the back of the house, where the lack of a window would not be noticed, was reserved for a new walk-in closet. When the reach-in closet was replaced with the new walk-in space, the entire area was opened up for a new layout. A closet system was installed around the perimeter of the room and was carefully planned to hold a variety of clothes. A free standing shelving unit was installed in the center of the space for shoes.
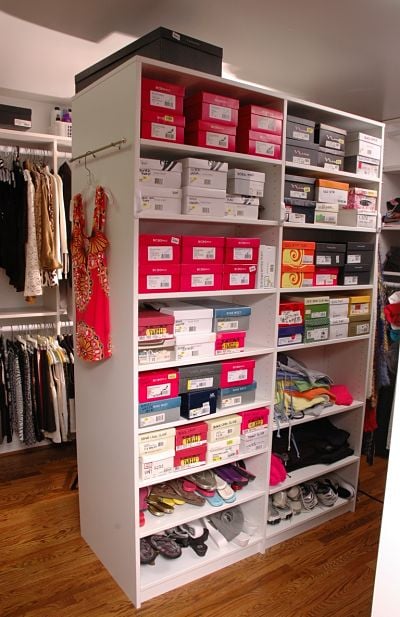
A shoe island comprised of stacked shelving, and double rods and shelves on the perimeter of the walk-in closet, provide ample space for clothing and accessories.

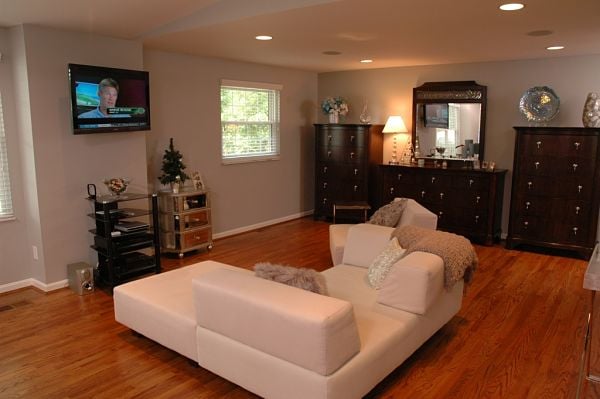
Flooring. New hardwood flooring was installed in the bedroom, sitting area and new closet.

Wood flooring and a vaulted ceiling create a feeling of open space in the bedroom and seating area.

5. Modify structural features and integrate the addition with the home.
Bedroom ceiling modifications. Rather than retaining an 8-foot ceiling height in the bedroom area of the addition (which was the existing height of the adjoining older portion of the space) the ceiling was given a low pitch vault and raised to 9-feet. To support the floor, a beam was installed in the floor over the garage door.
Bathroom plumbing. The plumbing for the master bath had to be reconfigured because the commode and shower were moved to the other side of the bath space. This resulted in locating a plumbing stack in an area of the kitchen on the first floor. The pipes could not be hidden within the floor. A soffit was created and crown detail was used to conceal the pipes.
Integrating heat ducts. New furnace ducts running from the basement to the new second floor area took a small portion of space from the garage.