In the home remodeling business we strive to create beautiful, functional and safe interior environments. This is especially true of bathroom remodeling projects. Bathrooms are often small spaces with many details. Most homeowners want to add amenities or expand the size of the room, especially if the room is a master bathroom.
When a home reaches the 30-year mark, often it is time to remodel. Fixtures and cabinets become worn. Lifestyles and interior design trends change. The project we are featuring this month is a renovation of a master bathroom in a house built in the 1970s. The owners of this home wanted to update the existing space comprised of three distinct areas: 1) a small bathroom with a tight step-in curtained shower, 2) a sink and toilet, and 3) an old laundry area and closet.
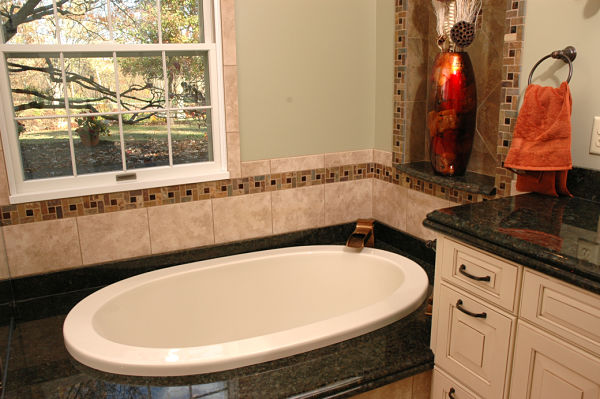
A small bathroom space was expanded and converted into a luxurious and functional master bath.

Universal Design Features
Comfort and safety are important considerations when we work with homeowners in designing a bathroom remodel. In this project, the master bathroom and the hallway leading to this space were both narrow, which limited movement through the space. The bathroom floor had been raised, requiring users to step up into the room from the hallway. A small shower required users to step over a threshold.
To address these limitations, which we commonly see in bathroom remodels, we incorporate “Universal Design” features into the design. The National Association of Home Builders (NAHB) defines “Universal Design” as:
“…the design of products and environments to be usable by all people, to the greatest extent possible, without the need for adaptation or specialized design.”
The NAHB says some Universal Design features are incorporated into remodels to help people as they age. These features include wide doorways, wide hallways and extra floor space. Other Universal Design features, according to the NAHB, “just make good sense.” These features include floors and bathtubs with non-slip surfaces, grab bars, thresholds that are flush with the floor, good lighting, and lever door handles and rocker light switches.
Homeowners’ Objectives
The homeowners’ objectives were:
- Expand the size of the bathroom to include a shower, soaking tub, double sink vanity and storage.
- Eliminate the need to step-up into the bathroom.
- Add “Universal Design” features that would provide comfort, access and safety for users. They also planned to stay in the home for as long as possible. They wanted the bathroom to be accommodating as their lifestyle or physical abilities change.
- Install an updated heating, ventilation and air-conditioning (HVAC) system in the room.
- Create an interior that would augment the general architecture and current design elements of the home.
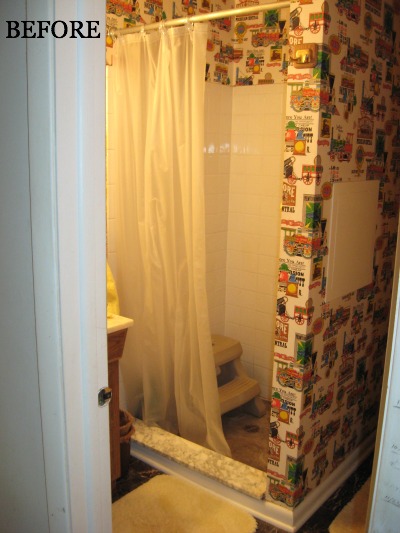
Before: A small step-in shower with a curtain in a home built during the 1970s.
Project Challenges
The challenges presented by this project included:
- Demolition and removal of walls to create a larger master bathroom.
- The Universal Design requirements.
- No existing HVAC in the center areas of the existing space.
- A slab foundation, which was the reason the bathroom floor had been elevated.
Neal’s Solutions
- The design combined the area used for the closet and laundry area with the existing bathroom to create a larger floor space. Walls were removed to open up the space for a curbless shower, tub, dual vanity and toilet. The design optimized space in the room by the integrated placement of the tub, shower, shower bench and vanity.
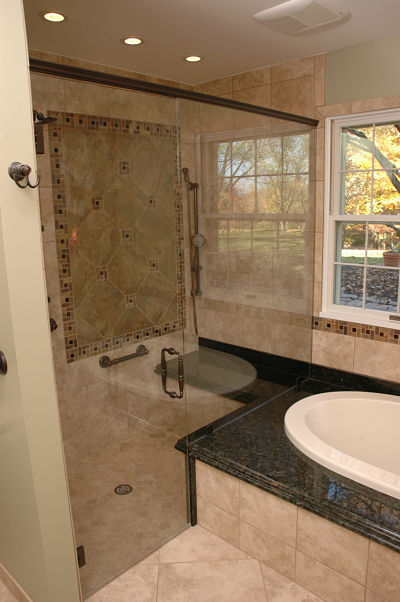
Integrated tub and shower.

- The slab floor was broken up to eliminate the step into the room and exposed the foundation to work in new plumbing and drain lines into floor.
- “Universal Design” features for this project included:
- Level thresholds leading into the shower and adjacent bedroom.
- Wider doorway clearances.
- Slip-resistant tile flooring including small square tile installed at an angle in the shower to provide traction underfoot.
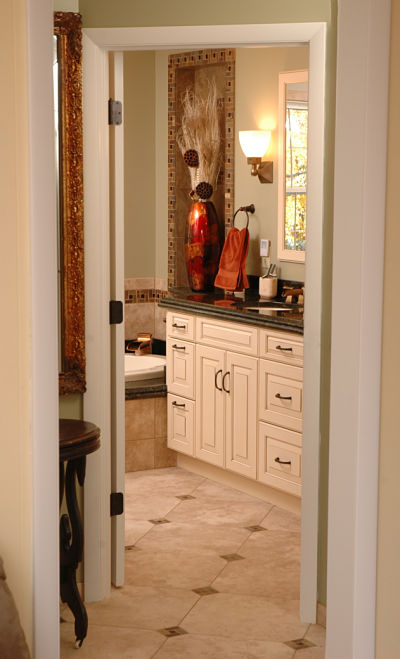
Level threshold and slip-resistant flooring leading from a bedroom into the master bath through a wide door clearance.

- Open floor space in the bathroom, in the event that a resident would need to use a can or walker.
- Improved lighting. Three uplights were used to illuminate the vanity area along with overhead recessed providing general lighting in the shower, above the tub and over the vanity.
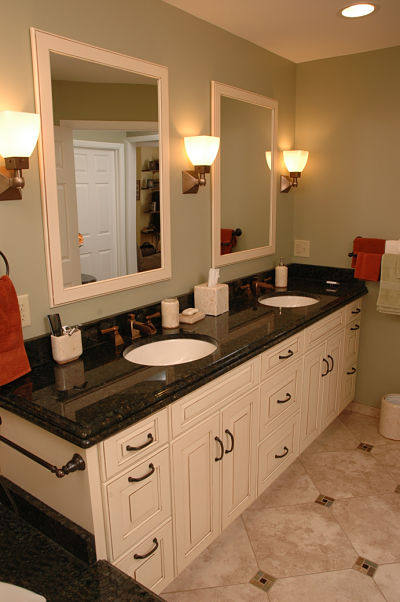
Uplights above a vanity and recessed lighting.

- Lever handles were used for the shower and sink faucets.
- A handheld showerhead and a bench were installed in the shower.
- Stylish handrails in shower and near commode for the safety of users.
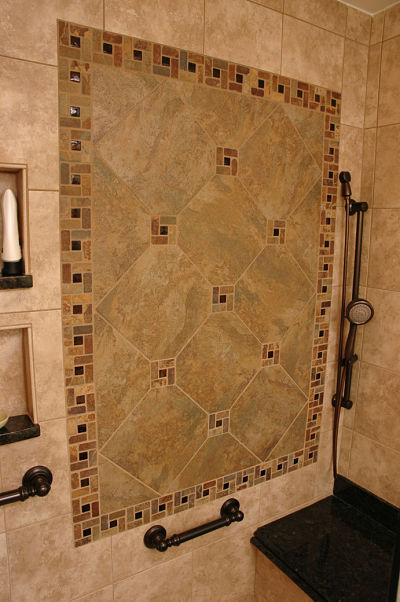
A shower bench, handrails and a handheld showerhead.

- C-shaped hardware was used on drawers and doors, rather than knobs, for easy access.
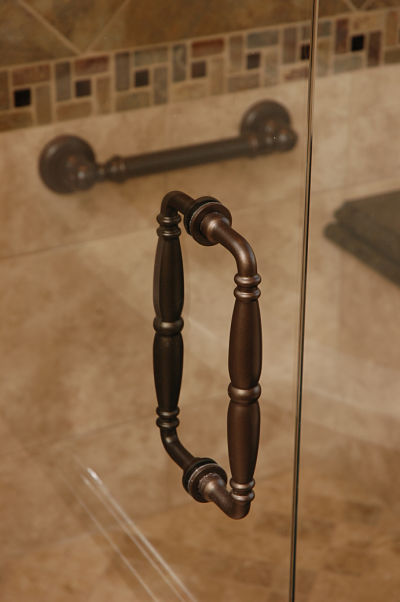
Accessible C-shaped handle hardware.

- A new HVAC system was installed. A heated floor, tub deck and shower bench were included in the upgrades.
- Design details that update the room and complement the architecture of the home include:
- A combination of finishes, both on cabinets and hardware, are neutrals that will work with any color as the client’s tastes change.
- The counter, tub deck and shower bench are topped with double thick black granite for an additional style statement.
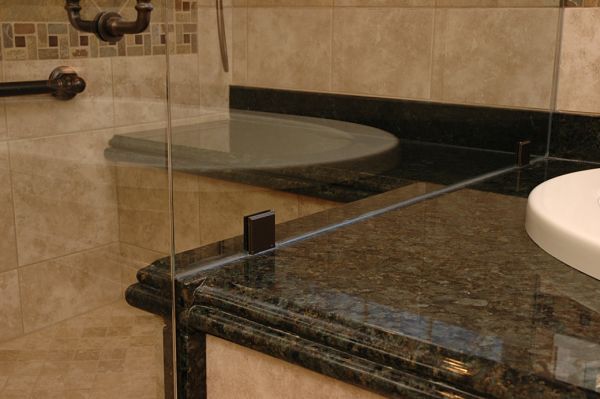
Double thick black granite used for the counter, tub surround and bench top.

- All areas of the new bathroom are designed for ease of use and economy of space, including a niche over the tub that utilized the extra wall depth required by the plumbing.
- A mixture of traditional and contemporary elements, primarily hardware, gives the room a unified look suitable to the existing style of the 1970’s home.
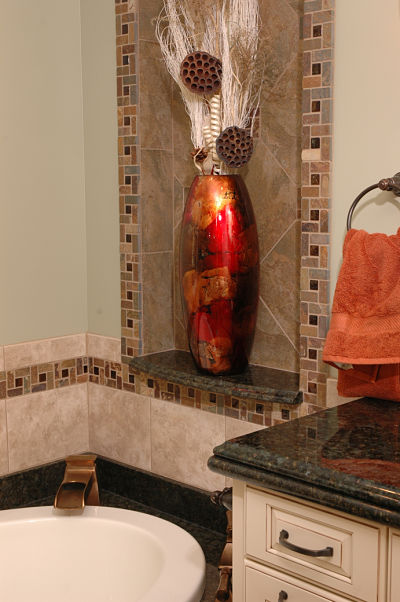
A niche over a tub was created from an area used for plumbing allowances.

